Versions Compared

Key

  • This line was added.
  • This line was removed.
  • Formatting was changed.
Excerpt

How to map a drive to the RDS server (rds6.cchmc.org) in Windows 7 & Windows 10.

Tip

Download a PDF copy of this document: RESITHUB-MappingRDSWin-240423-1600-868.pdf.

Info
titleGetting Access to a Drive
  • If access has not yet been requested for you, you can submit a request yourself in Permissions Manager. The submitted request will need to be approved by any one of the authorizers, who are automatically notified when you submit the request. When the authorizer has handled your request, you will be automatically notified via an email from Permissions Manager.

  • After being granted access to a drive, you must restart your computer before mapping a drive to it. If you are denied access to a drive, please restart your computer and try mapping it again.

  • Authorizers can grant access to users via the Permissions Manager. Authorizers do not automatically have access, but they can grant access to themselves.

  • The Permissions Manager can be accessed here: https://bmirdsdp.chmccorp.cchmc.org/dp/.

  • Instructions on how to use Permissions Manager are here: https://confluence.research.cchmc.org/x/dgNcAw.

  • You must be connected to a CCHMC network to access a project drive.
    • If you are on-site this means your computer is plugged-in with an ethernet cable or you are connected to the "chmc-bus" wireless. The "childrens-guest" wireless will not allow you to access project drives.
    • If you are remote you must be connected to either the CORP VPN (connect.cchmc.org) or RES VPN (asa.research.cchmc.org). Both RDS6 and BMIISI project drives are accessible through either VPN.

Animation-DataStorage-MapRDSWinImage Added

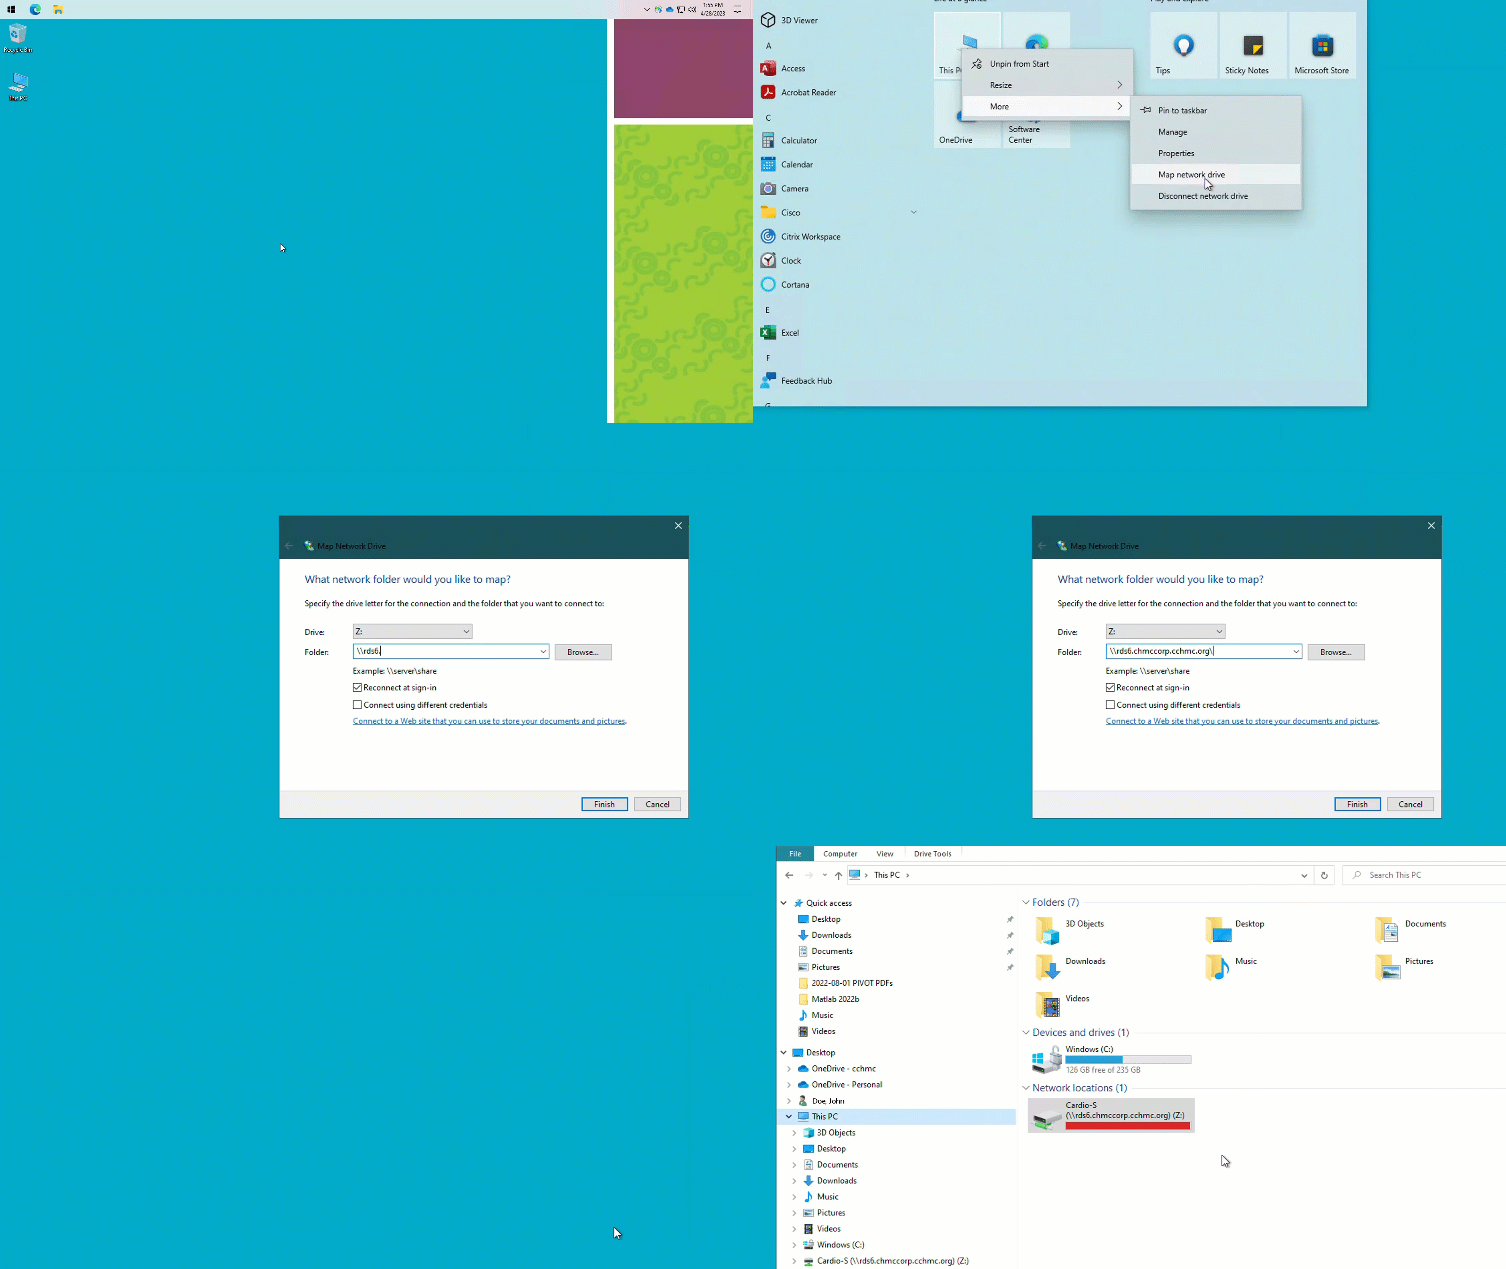
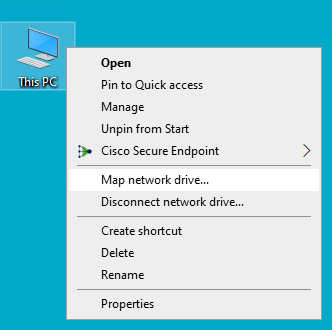
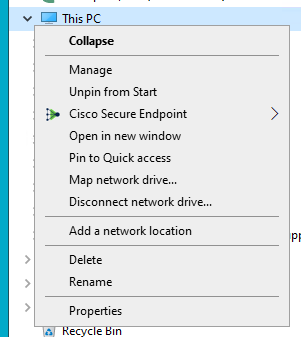
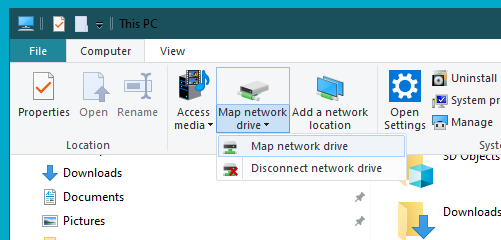
  1. Right-click This PC on your desktop and select Map Network Drive. You can also right-click This PC in File Explorer or select Map Network Drive from the File Explorer "Computer" menu:
    Screenshot-DataStorage-MapRDSWin-RightClickImage ModifiedScreenshot-DataStorage-MapRDSWin-RightClickExplorerImage ModifiedScreenshot-DataStorage-MapRDSWin-ExplorerMenuImage Modified

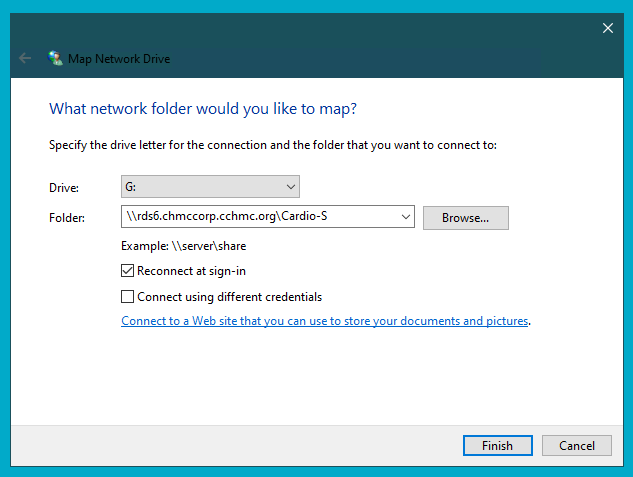
  2. The "Map Network Drive" window should appear. For the Drive field, select the letter you want to assign to the network folder you're mapping. In the Folder field, type or paste the address of the folder you would like to map. For example, if you are mapping your division's shared folder on the Research Data Storage (RDS) system, you would probably select "G:" for the Drive and enter "\\rds6.cchmc.org\YourDivision-s" for the folder path. In the screenshot below we are using "\\rds6.chmccorp.cchmc.org\Cardio-S" for the folder path.
    Screenshot-DataStorage-MapRDSWin-MapDriveImage Modified

  3. Check the box to "Reconnect at sign-in" and click the Finish button.

  4. If prompted for your network credentials in the "Windows Security" window, enter your CCHMC User ID and password.

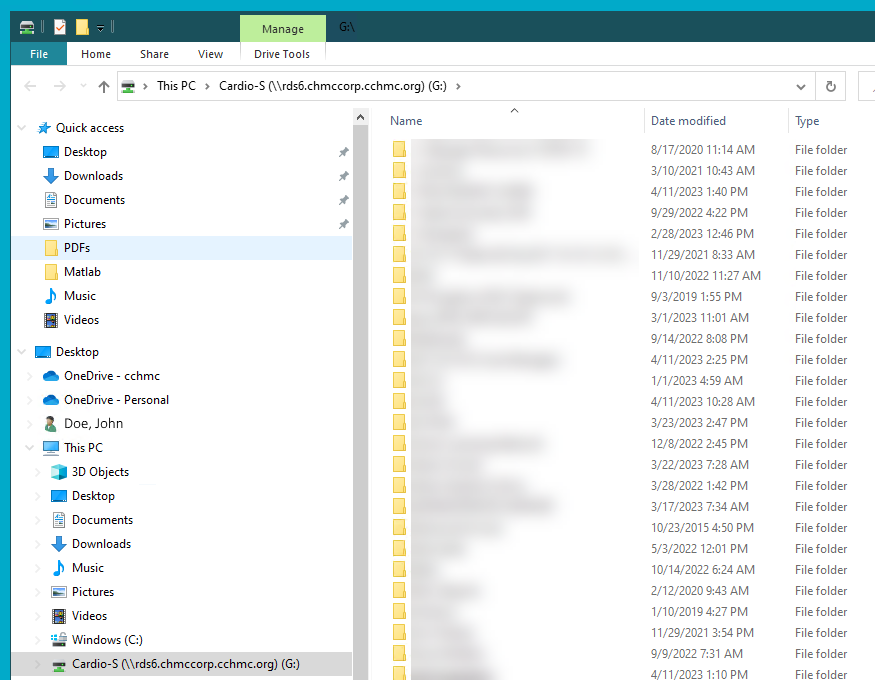
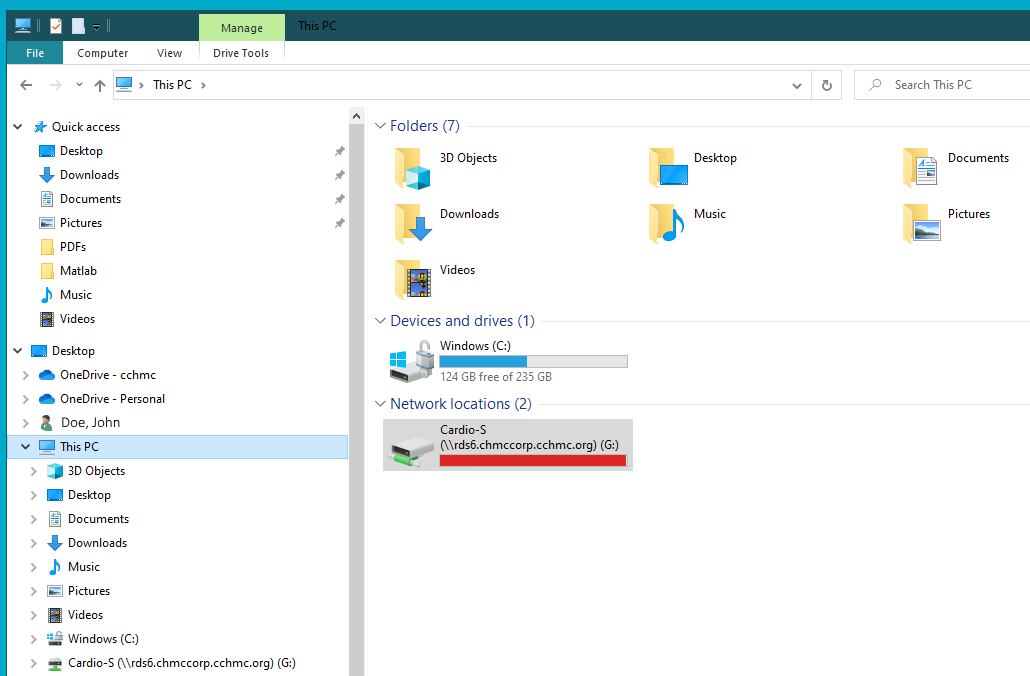
  5. The drive is now mapped.
    Screenshot-DataStorage-MapRDSWin-DriveMountedImage ModifiedScreenshot-DataStorage-MapRDSWin-DriveMounted2Image Modified

Getting additional help

If there are still any issues after reading these instructions and any help is still needed, please email help-rds@bmi.cchmc.org or call the Service Desk at 636.4100 for further assistance.