Address: https://ritstore.research.cchmc.org/bmistore/
Login with your CCHMC username & password. Please contact help@bmi.cchmc.org with any questions.
...
- Login to the BeMyIT Store at https://ritstore.research.cchmc.org/bmistore/.
- In the Resources area, look under the tab labeled "Manageable Resources" and find the resource you wish to change.
- Click the "Request Change" button to the right of the resource.
- Depending on the resource you've chosen, you can change the:
- Quota
- Backup
- Memory
- CPUs
- When you finish, click the Request Change button.
...
- Login to the BeMyIT Store at https://ritstore.research.cchmc.org/bmistore/.
- In the Resources area, look under the tab labeled "Manageable Resources" and find the resource you wish to change.
- Click the resource name/path or the Request Change button.
- Click "Budget" in the left-hand menu.
- In the Budget Information section you can Add a budget number, Delete a budget number, or change the Budget Allocation:
- Add a Budget Number
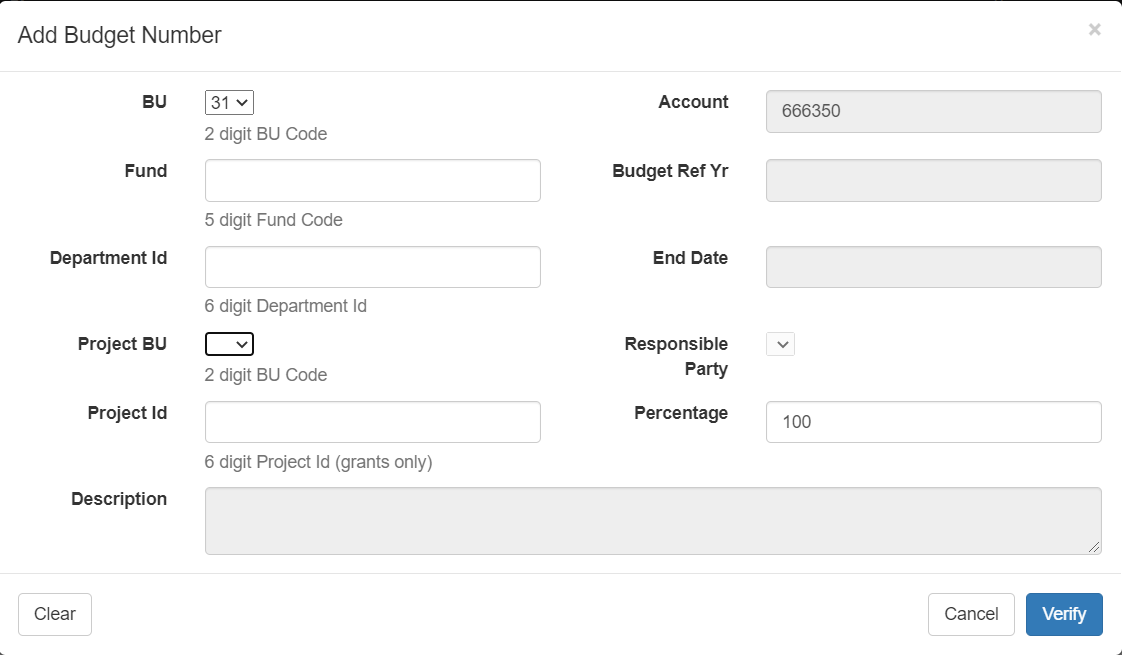
- Click the Add button to display the Add Budget Number window.
- The entry for budget number is broken-up into separate fields. Select or fill-in each of the fields: BU, Fund, Department ID, Project BU, Project ID, and Percentage.
- Click the Verify button at the bottom.
Look for a Success message at the top of the window when your budget number verifies.
Info title Budget Number Error If budget number does not verify, then send an email to help@bmi.cchmc.org with the budget number that you want to use, and we will take care of it for you.
- The Account, Budget Ref Yr, End Date, and Responsible Party fields will be auto-filled for you when the budget number verifies.
- Click the OK button at the bottom to close the Add a Budget Number window.
- Click the Save button under the Budget Information section to finish adding the budget number.
- Remove a Budget Number
- Click the checkbox next to an existing budget number in the list and then click the Remove button.
- Click the OK button in the popup to confirm you want to remove the budget number.
- Click the Save button under the Budget Information section to finish adding the budget number.
- Change the Budget Allocation
When adding a budget number you can specify how much of the charges will be allocated to it. The Percentage field defaults to 100% but can be edited while adding the budget number.- If you want to change the allocation after you've already added a budget number, just add your second (third, fourth, etc) budget number, set the Percentage, and save it.
- Then when you return to the main Budget Information section you'll see a message prompting you to change the allocations.
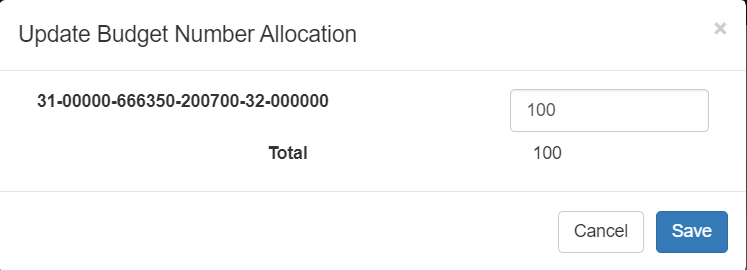
- Click the Budget Allocation button and the Update Budget Number Allocation window will appear.
- Reduce the Percentage field for the displayed budget number from 100% to the correct amount so that the total of all your budget number allocations will be 100.
- Click the Save button to close the Update Budget Number Allocation window.
- Click the Save button under the Budget Information section to finish adding the budget number.
- Add a Budget Number
...
- Login to the BeMyIT Store at https://ritstore.research.cchmc.org/bmistore/.
- In the Resources area, look under the tab labeled "Manageable Resources" and find the resource you wish to change.
- Click the "Request Change" button to the right of the resource.
- In the Resource Info section, click the "Update Ownership" button, or choose the Ownership section from the links to the left.
- To Change the Owner:
- Click the "Change Owner" button in the Owner/Principal Investigator section.
- In the New Owner Section type the user's Name or User ID. It will search and prompt with a list of matching users to select. If it is not showing the correct user, try entering the User ID to search for the user.
- Select the User and click the Save button.
- To Add a Resource Manager:
- Click the Add button.
- Type the user's Name or User ID. It will search and prompt with a list of matching users to select. If it is not showing the correct user, try entering the User ID to search for the user.
- Select the User and click the Add button.
- To Remove a Resource Manager:
- Select an existing Resource Manager by clicking the checkbox to the left of the User ID.
- Click the Remove button.
- Click the OK button to confirm.
- To Change the Owner:


