| Excerpt |
|---|
How to add and remove members from a Permissions Manager Group.The Permissions Manager tool also allows us to create specialized user groups on the Research Data Storage systems and manage those group memberships. |
Only the Group Authorizer will be able to add or remove users from a group. Users cannot submit Permissions Requests for access to a group and there is not an email approval process. Users can only be manually added to groups by the Group Authorizers. Please email rds@bmi.cchmc.org if you want to have a group created for your use or have questions on when a group may be useful.
| Warning | ||
|---|---|---|
| ||
Please use Firefox or Chrome to access the Permissions Manager. Safari and Edge have been known to have problems with this application. |
| Tip | ||
|---|---|---|
| ||
If you see a browser security error when trying to access the Permissions Manager, please follow the instructions here to resolve the error: Fix Security Error for Permissions Manager. |
Adding Users to a Group
- Open Permissions Manager https://bmirdsdp/DP/ (https://bmirdsdp.chmccorp.cchmc.org) and click to expand the Management tab in the left-hand menu, and then click on the Group Authorizer section.:

- You will only see the groups listed that you are an Authorizer for. In our example we are using the group named "gS-DP_GroupName". Select the group you'd like to add a user to.:

- Click the Members tab in the right panel.:

- Click the "Add Member" button at the bottom top of the panel.
:
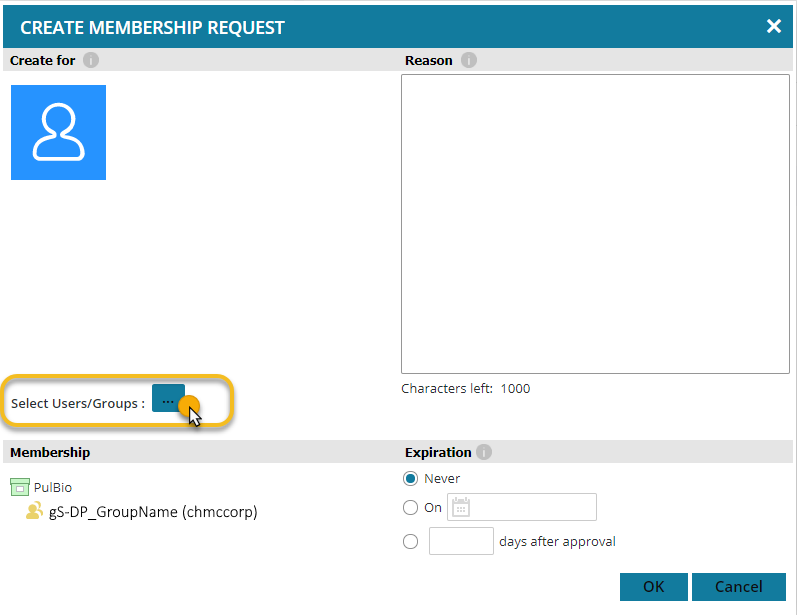
- In the Create Membership Request screen that opens, click Click the "..." button next to "Select Users/GroupGroups".:
- The Users/Groups Search window will appear . Click the "..." button again to browse for a user.
and you can search for the user you wish to add to the group. In the empty Search textbox, enter the user’s name as "last name, first name and click on Search. If ". If you are not sure of the spelling of the namenames, then type the last letter just a few letters of the last name, followed by a coma, and the first letter of the first name. Click on Search.:

- If a list of multiple users is displayed, then check the corresponding Department , Logon Name, and Title or Logon Name listed for the users.
user. If you know the Logon Name (Network ID at Cincinnati Children’s) of the user, then click in the box labeled Name, select Logon Name and enter the network ID in the blank textbox.
- Once the user is found, click on their name in the Display Name column and click the OK button to close the Users/Groups Search window.
- Click on the Display Name of the desired user and then click the "OK" button at the bottom of the window.
Click the "Add ↓" button under the text box and then click the "OK" button at the bottom of the window.
Provide a reason for adding the user to the group in the "Reason" text box.
- If a user needs permissions for a finite length of time, you can enter the date or the number of days after which you want these permissions to be automatically revoked in the Expiration area.

- Click the "OK" button.
- The user will now appear in the list of Members.
...
- Open Permissions Manager (https://bmirdsdp/DP/), click to expand the Management tab in the left-hand menu, and then click on the Group Authorizer section.
- You will only see the groups listed that you are an Authorizer for. In our example we are using the group named "gS-DP_GroupName". Select the group you'd like to remove a user from.
- Click the Members tab in the right panel.
- Select the user you want to remove and click the "Remove Member" button at the bottom top of the panel.

- Provide a reason for removing the user and then click the "OK" button.

- The user has been removed.